Storage locations
Assigning storage locations to your product variants allow you to quickly locate and pick items from your warehouse. The locations are displayed in Scan to Ship when you start and fulfill an order.
What is a storage location?
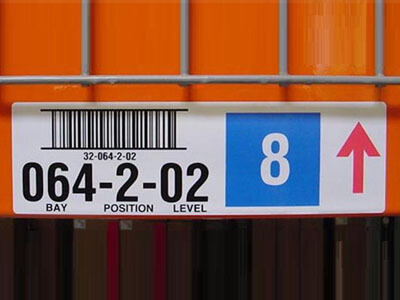
 A storage location (or “warehouse bin”) can be set for each product variant. The format of a storage locations is up to you but usually follows some conventional format such as “D-12-4-2” where D is the warehouse aisle number, “12” is the rack number within the aisle, “4” is the shelf number, and “2” is the individual storage bin on the shelf. The following resources offer good tips and conventions to help you design your storage location naming system:
Storage locations can be viewed and updated from the Storage Locations page accessible from the dashboard page or the Shopify app menu.
Assign a single storage location
To assign a storage location to a product variant:
- From the Scan to Ship Dashboard, go to the
Storage Locationspage. - Enter a SKU, barcode, or title into the search box to locate your product.
- Click on the
Editlink next to the variant or click “+ set location”. - Enter a storage location label into the text box and click the
Save Changesbutton.
Upload multiple storage locations
To upload multiple storage locations at once, you can upload a spreadsheet where each row specifies a product variant along with it’s storage location. It’s easy to get started by downloading your existing product variants as a template spreadsheet from the Storage Locations page.
To download the template spreadsheet:
- From the Scan to Ship Dashboard, go to the
Storage Locationspage. - Click the
More actionsdropdown button. - Click the
Download Spreadsheetmenu item. - Wait for your template file to be be generate. If you have a large number of products, this may take a few minutes. When it’s ready, a link will be displayed to download the file.
- Download and open the template file in your spreadsheet editor, such as Microsoft Excel or Google Sheets.
The spreadsheet will contain existing data for all variants. You can safely remove rows if you only care about certain products. When import a spreadsheet, product variants that do not appear in the spreadsheet will be ignored.
To upload your storage locations:
- Fill in the
Storage Locationcolumn with your storage location labels. - Navigate back to the
Storage Locationspage. - Choose
More actions→Upload Spreadsheet... - Select your file, and make sure “Update storage locations” option is chosen from the drop-down menu.
- Click the
Upload & Importbutton. - The following page will show your upload and it’s import status. If you have a large number of products, this may take a few minutes.
- You will also be notified by email when the import is complete.